|
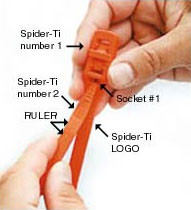
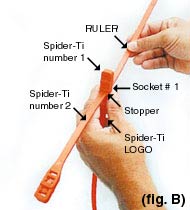
Double Spider-Ti® Instructions Create distance between limbs using two Spider-Ti's® to secure as shown: 1. Hold Spider-Ti® number 1 so the Spider-Ti® logo is visible, to side facing up. (fig. A) 2. Hold the tail end of Spider-Ti® number 2 so the ruler side is facing up. (fig. A&B) 3.
Slide the tail end of Spider-Ti® number 2 all the
way through the dry socket marked #1 on Spider-Ti® number
1, until it hits the stopper. (fig. B) |
|
|
|
|
|
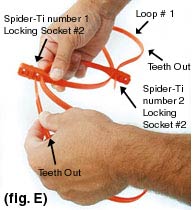
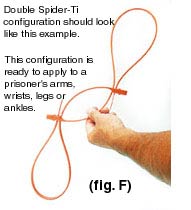
5.
Take the tail end of Spider-Ti® number 1 and create
a loop with the teeth to the outside, slide it into the locking socket
marked #2 on the same Spider-Ti®. Repeat the procedure
with Spider-Ti® number 2 to create a second loop.
(fig. E&F) |
 |
 |
 |
|
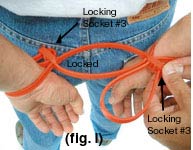
7.
For extra strong locked security, slide the tail ends of the Spider-Ti's®
back through the second locking socket marked #3 and tighten. (fig.
I) |
 |
 |
 |